Writing vectorized code is an acquired skill. Whether you’re writing code for a hard deadline or for pleasure, and whether your project is greenfield development or an inherited codebase, developing clean, efficient, and effective vectorized code requires thought and effort.
So why bother?
Vectorization enables your software to get the most performance possible from your hardware. The days are over when clock frequency alone drove CPU performance; gains increasingly come from data width and core count. Getting the most out of your chip means taking advantage of its supported vector instruction sets.
To get going down the right path, it is important to know a few key elements—what vectorization is, when it is applicable, some development strategies, and how to keep things maintainable.

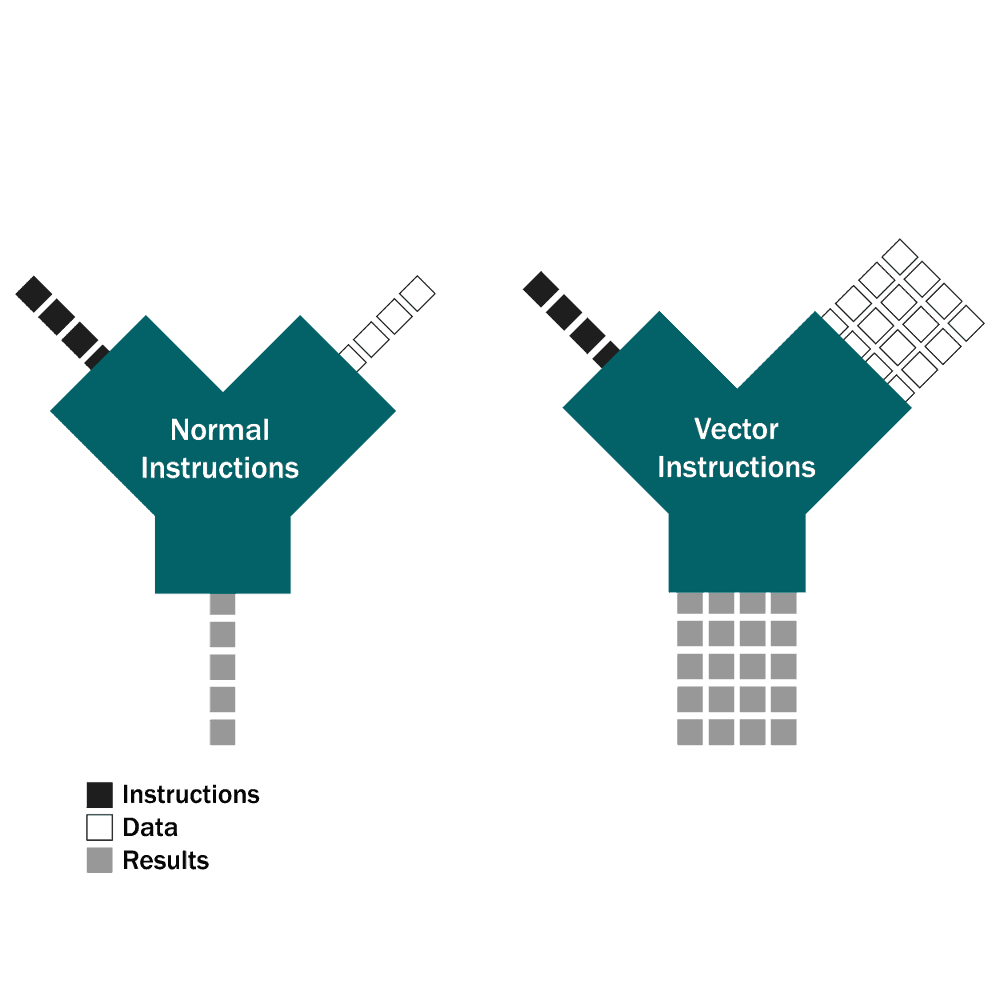
Vector instructions are a special set of intrinsic functions that take advantage of data parallelism. Data parallelism occurs in when the same operation needs to be applied to large amounts of data in a sequentially independent manner. The most fundamental examples are array and matrix manipulation, with applications in graphics and signal processing.
There are several approaches to tackling data parallelism. The simplest implementation is to put the operations in a loop, executing the instruction on a single element each iteration. The next most familiar implementation is parallelizing that loop with threads, with each thread executing the instruction on single element of a subset of the data each iteration. The vectorized implementation, by contrast, executes the instruction on multiple elements each iteration.
Vector instructions are also known as Single Instruction-Multiple Data (SIMD) instructions and can operate on data widths ranging from 64-512 bits. This is parallel processing on a single core, and can even be used in tandem with threading to maximize the throughput of the entire system.
Vector instructions are best applied in certain situations. There are a number of qualifications you can use to check if the performance benefits of vectorizing your code will be worth the effort.
Once you’ve decided to develop vectorized code, following a few tips can make the process simpler and the results better.
Portability considerations play a large role in instruction set selection, but keep in mind that there are different kinds of portability.
Do you want the same binary to run with high performance in multiple environments? Then you may use Intel’s _may_i_use_cpu_feature, or the more general cpuid functionality in order to determine the supported instructions and dynamically choose the best implementation. Or, do you want the same source code to be recompilable for different processors, and the lower level details managed for you? Then you may use Visual Studio’s auto-vectorizer tool (though it has limited capabilities) or the generalized GNU vector extension instructions, which support the SSE, AVX, and NEON instruction sets under a common hood. Note that choices made at this stage can effectively either lock you into an instruction set while allowing for tool portability, or lock you into a tool while allowing for instruction set portability.
Choose the solution appropriate for your situation.
Once you’ve identified your vectorizable region, vetted any libraries you may interface with, and chosen an instruction set, it’s time to dive in. Start with a non-vectorized implementation to prove out the base algorithm, then get vectorizing. Preprocess the input, perform operations, and postprocess the output. Know that there’s a lot more work going into data management than in ordinary code. Memory-align buffers on multiples of your instruction width, and mind data format and sizes. Use smaller data sizes when practical to squeeze more value into each clock cycle.
Experiment, debug, and optimize.
During this stage, two techniques make development faster: utilizing preexisting code and creating visualizations.
Preexisting vectorized code makes development far easier. If you’re porting code to a new instruction set, there are often corresponding functions. For example, AVX is essentially a 256-bit version of the 128-bit SSE; when porting from one to the other, it at times can be (almost) as simple as including the new header and adding the “256” identifier in the instruction names. Even when the correspondence isn’t that high, preexisting code offers a proven data structure and processing flow.
Visualizations are another valuable tool. It is easy to mentally juggle a few variables processed in a single pass, less so when you are processing eight or sixteen values at once, with intermediates, shuffling, shifting, and extracting. Drawing the data path out by hand or in a spreadsheet makes things much clearer. Getting from point A to point D can be intimidating. Finding an instruction that can get you from A to B, then from B to C, and finally from C to D, and visualizing this flow with a spreadsheet makes things seem much more manageable.
Once the vectorized code is prototyped and functional, you are still not quite done. First you make it work, then you make it right.
Due to the inherent complexity of vectorization, there is a greater need for clear, concise, and readable code. Some situations call for portability and backwards compatibility; this is certainly the case when writing non-embedded code that will run in an unknown environment. Defining a common, minimal interface helps keep runtime selection for portability maintainable.
It may take some extra effort, but developing vectorized code results in high performing applications that take full advantage of available hardware features. When done well, it remains portable and clean, and its development can be a very rewarding experience.
This should provide a basis for you to get going on your own vectorized application, but if you think we can help with your next project, contact DornerWorks for a free consultation.